Welcome!

Welcome to Craft With Cheryl — I’m so glad you’re here 💛

I share weekly card making classes and fun paper crafting ideas using Stampin’ Up! products. Whether you’re brand new or have been crafting for years, you’ll find simple, step-by-step projects you can create right along with me.


🎥 Join Me Live Each Week
Tuesday: Mystery Stamping
Thursday: Card Making Class

🎥 Watch My Latest Class


✂️ My Favorite Tools 💌 Get Free Weekly Tutorial

Let’s get crafting! 😊

Tuesday, January 31, 2017

Thanks for Building Me Up


All images © 1990-2016 Stampin’ Up!®
Cheryl Wright –
www.CraftinWithMe.blogspot.com

Supplies:
·         Stamp SetsNailed It (143077)
·         Card Stock/DSP  – Crumb Cake (120953); Pacific Point (111350); Shimmery White (101910)
·         Stamp Pads – Basic Black Archival (140931); Chocolate Chip (126979)
·         Misc. – Hexagons Dynamic Embossing Folder (143231); Build It Framelit Dies (143230); Urban Underground Embellishments (142786); Watercolor Pencils (141709); Duet Banner Punch (141483); Sponge Brayers (141714); Basic Black Stampin’ Write Marker (100082); Stampin’ Dimensionals (104430); Fast Fuse (129026); Mini Glue Dots (103683); Blender Pen (102845)
     
Measurements:  
·         Crumb Cake – 4.25”x5.5”; 3.75”x5”; scrap for punch
·         Pacific Point – 4”x 5.25”
·         Shimmery White Cardstock approx. 4”x 2” for tools
           

Instructions:
1.    Score and fold Crumb Cake base. Adhere Pacific Point to base.
2.    Emboss 3.75”x5” Crumb Cake with Hexagons Embossing Folder.  Use brayer to add Chocolate Chip Ink.  Adhere to Pacific Point.
3.    Stamp, color, blend, and cut out tools.
4.    Stamp sentiment on scrap piece of Crumb Cake.  Punch with Duet Banner Punch.
5.    Line edges with Black Marker.
6.    Arrange Banner and Tools.  Adhere Banner with Dimensionals. Adhere tools with Glue Dots.
7.    Add screw embellishments.

Thursday, January 12, 2017

I'm back!

My Christmas break lasted a little longer than planned!  I'm back in the swing and even just scheduled my first class!  You're invited!  All the information is on my Facebook Page.

Sale-a-bration (which I will often refer to as SAB) and the Occasions Spring Catalog Products are available NOW.  There are so many beautiful things and some fun ones too!  If you are unfamiliar with Sale-a-bration, for every $50 purchase you get to select 1 free exclusive product.

If you watched my Pre-Order Unboxing Video, you know that I really liked the SAB Hey Chick Stamp Set and the Watercolor Pencils and...  Anyway, I tried the Pencils with both the Aqua Painter and the Blender Pen.  Which one do you like better or do you have a preference?


Tuesday, December 13, 2016

Monday, December 12, 2016

Going, going, gone!


Don't miss out on this great sale!  Items are selling fast!  Go check it here now!  Click Shop Now.

Wednesday, November 30, 2016

Gingerbread Man Tag & Gift Box

Remember today is the last day to get some great stamps at 25% off  during the Stitched from the Heart Sale!  Shop here now!

Here's a quick tutorial for your gift giving!


All images © 1990-2016 Stampin’ Up!®

Supplies:

·         Card Stock/DSP  – Real Red (102482); Whisper White(100730); Candy Cane Lane DSP(141981)
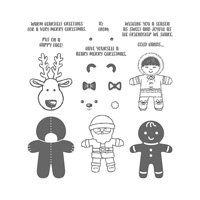
·         Stamp Set – Cookie Cutter Christmas(142043); Hang Your Stocking(142114)
·         Stamp Pads – Real Red(126949); Crumb Cake(126975)
·         Misc. – Gift Box Punch Board(135863); Kraft Rope Trim(141996); Cookie Cutter Builder Punch(140396); Scalloped Tag Topper Punch(133324); Mini Glue Dots(103683); Stampin’ Dimensionals(104430)
           
Measurements:  
·         Real Red Scrap to punch bow
·         Whisper White – 2” x 4.5” and a scrap for gingerbread man approx. 2” x 3”
·         Candy Cane Lane DSP – 12” x 12”
·         Kraft Rope Trim – 42“
           
Instructions:
1.    Follow directions from Gift Box Punch to form the box from the DSP.  Fill box and close.
2.    Stamp gingerbread man from Cookie Cutter Christmas set using Crumb Cake ink pad on white paper.  Punch gingerbread man with Cookie Cutter Punch.  Punch red bow.  Adhere bow with glue dot.
3.    Punch 2” x 4.5” white piece of paper with Scalloped Tag Topper Punch.
4.    Stamp sentiment at top of tag from Hang Your Stocking stamp set with Real Red ink, then stamp To/From stamp at the bottom of tag.
5.    Adhere gingerbread man on tag with dimensionals.
6.    Tie Kraft Rope Trim around box.  Attach tag.

Repeat as needed!


Monday, November 21, 2016

Good Things Come In Small Packages

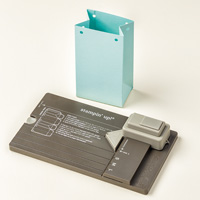
At least that's what my mom always said!  This gift bag was a fun one I made while at the craft show last weekend.  I was my first try with the Gift Bag Punch Board.  It was quick and easy.  Fun too!   You can make bags in several sizes. This one is about 2.5" wide, 2" deep, and 4" tall.  What would you like to find in a gift bag like this?


The gift bag is 30% off until Midnight tonight (11/21/16).   Here is a list of all the sale items for Stampin' Up!'s Online Extravaganza!  Some products are on sale all week and some for just 24 hours!